Learn all about Stable Diffusions Parameters, what they do and how to use them
Have you ever just sat there and felt so confused when it comes to using Parameters with stable diffusion? You keep seeing words thrown around like Seed, CFG scale and even negative prompt. You still don’t have a clue what all of this means or how to use it? Well then let us help you out. We have created this complete guide to help people new to using stable diffusion parameters.
Hey, even if you are an experienced user that still has not yet mastered all parameters this guide might also be for you. Don’t be shy read on, you might learn a thing or two. We will be provided examples of each parameter so you can really get to grips with what each one is doing to your images.
By the end of this article you can safely say you have mastered the use of Stable Diffusions Parameters and you should be able to implement them correctly, well we hope 😅
Let’s Start at The Beginning The Negative Prompt
A Good negative prompt is the basis of a great image. Without it your going to end up with some pretty random, poor quality images. Sure if you use a custom model you might get some improvements sure. But in order to be a prompt engineer you need to master the negative prompt.
A negative prompt is basically the opposite if your prompt. It’s the things you don’t want stable diffusion to generate.
Let’s say you are generating an image and you keep getting something strange in your generation, let’s say “Shreks head” to be fair these days anything is possible. You would head over to your negative prompt and type “Shreks head” this will try to eliminate this from your AI generated image.
A lot of users don’t pay much attention the negative prompt. They will spend hours crafting the perfect prompt and still not get the ideal results they want. Some times all you need to do is to tell stable diffusion that you don’t want an image close up or a certain angle or perhaps to not use a particular art style. It’s all trial and error really.
If you are struggling to create a negative prompt we will share with you the basic negative prompt that helps solve a wide range of issues:
"lowres, text, error, cropped, worst quality, low quality, jpeg artifacts, ugly, duplicate, morbid, mutilated, out of frame, extra fingers, mutated hands, poorly drawn hands, poorly drawn face, mutation, deformed, blurry, dehydrated, bad anatomy, bad proportions, extra limbs, cloned face, disfigured, gross proportions, malformed limbs, missing arms, missing legs, extra arms, extra legs, fused fingers, too many fingers, long neck"The above negative prompt is good for when you are trying to generate quality images of people. If you need more help with creating realistic people you can check out our guide here.
Here is an example of the use of a negative prompt. In picture one it is just the prompt with no negative, where as picture 2 is the same prompt with a negative included.
Please note for both images they use the same CFG Scale, the same seed, sampler and the same prompt. You will learn more about this later on in the guide. The only difference is one has a negative prompt the other doesn’t.

Can you see how much difference a negative prompt makes to an image? It helps define the things we don’t want to see in the image, making it clear and more of what we expect the image to look like. Please note a negative prompt can come across a little offensive at times, but sadly we need to be straight to the point with stable diffusion. So if you want something to not look fat, thin or ugly you need to let it know. Same if you don’t want it to look pretty etc.
It’s worth while to point out that you can also add negative prompts for a wide range of images, not just people. For example if you wanted to create a picture of wild life or animals but want to make it look more realistic. Well then, you would want to write ” illustration, painting, drawing, art, sketch” in your negative prompt.
You are really limited by your own imagination. The more you use the negative prompt the more you get used to what works and what doesn’t, so play around with it a little and see what you get.
If you like this guide on stable diffusion you might like:
Using Steps 🪜
No we are not talking about the band here. We are talking about the steps stable diffusion uses to come up with your image.
The way stable diffusion works is by creating an image. It starts off with a canvas full of noise, think of the static on your tv screen. As each step passes it diffuses your image to create the final image. This parameter controls the number of these steps.
When using Steps sometimes more is not always better and sometimes you really do need to use more. We recommend our users stick to around 25, as it gives a pretty good result. If you have the patience go up to 120. Please note the higher the number of steps the longer it will take to generate your image.
Want to know how many steps you need to use, fell this simple breakdown guide:
- New prompt you are just trying out? Need a fast generation to see if you are on the right track. You will want to choose. 10-15 steps We recommend you generate 4 images at a time though.
- Satisfied with the prompt? Push it up to 25. Again generate 4 images and see if everything is pointing towards a great piece of art.
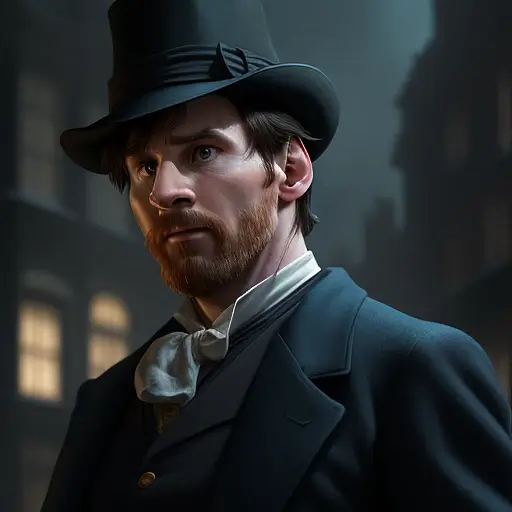
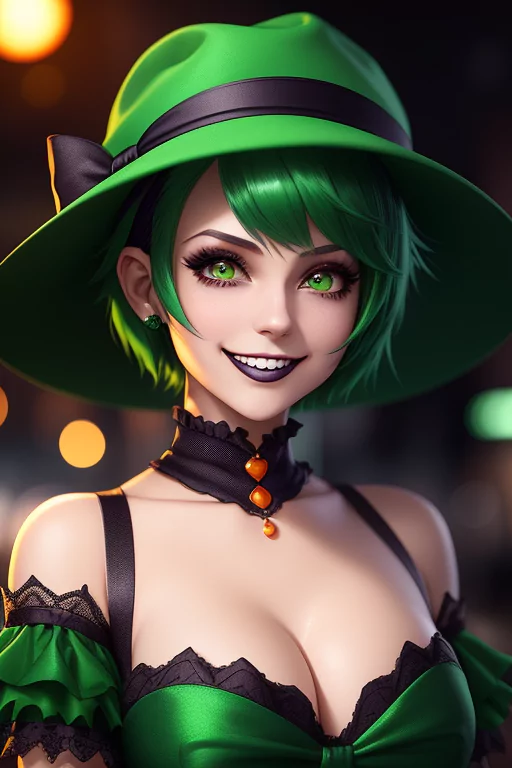
- If you want higher quality like the face in the above photo or perhaps you want some character features more texturized, we recommend you push it up to 60.
- Want to push it all the way up to 125? give it a go it’s fun. Why 125? well we like the number and we felt anything higher had, little or no effect.
If you see the below picture you can see the image doesn’t change much after 80 steps. So in some cases it’s not worth upping, you are just wasting time at that point.

In most cases you won’t need to create images as high as 125 steps especially if you are using the new samplers that have been added to stable diffusion. Some of these samplers work a lot more effective then others and don’t require as much GPU power to generate images. So it’s worth playing around with these samplers to see what results you can get.
As we have said before creating images with stable diffusion is basically trail and error, once you find something that works you tend to save the prompt and stick with it. We show you how to create your own characters with stable diffusion so you don’t have to go through the hard work of learning it on your own.
The Correct Use of Samplers
Some people will tell you that samplers make no difference at all and you should just use the default. Don’t listen to them they don’t understand how these samplers work. Sure some of them will give similar results but others do actually make a difference, you normally find that difference by using amore steps. So don’t stick to 7 push to 25 like we said before.
As we mentioned before, Diffusion models work by denoising a starting noise canvas. This is where Diffusion samplers come to work. In simple terms, these samplers are algorithms that take the generated image after each step and compare it to what the text prompt requested, and then add a few changes to the noise till it gradually reaches an image that matches the text description.
Here are 3 samplers you are going to want to pay attention to:
- Euler A – the default, can’t go wrong should work with most generative art pieces
- DPM ++ 2M Karas – If you are looking for high detail this is the one you want to choose, great for creating portraits of people
- DDIM – This is normally used for speed. We tend to stick with the top two, unless we want to throw something together quickly
Here is an example of these samplers used to create an image. The prompt is the same throughout as well as the seed phrase. This helps us generate a close comparison.

We personally use Euler A with the DreamShaper model is it offers a more fantasy style look then the other models You can clearly see this in the above image as we used this model to generate the above images.
The other two are best for high quality images and of course for speed. We recommend you try out all the samplers that Stable diffusion has to offer so you can find out the style you like and want to use. As you can see DIMM and DPM++ 2M Karras are quite similar only when you look closer can you see that DPM++ 2M Karras is of better quality. So if that’s the thing you want we would recommend you use that sampler. DIMM seems more rushed.
What most people tend to do is they will spend the first few days using stable diffusion trying to find out their own art style. Once they have found it they tend to stick with similar settings so they might use the same model, sampler for quite some time because they like the look of it. So why not play around a little and try to find your style.
Please note there is no rule on which sampler you should use. It really depends on what image you are trying to create. Sometimes the sampler will show very little difference to the image you have created. You won’t know this until you start using this parameter with stable diffusion. So start testing out your generations. As we said 25 – 125 steps! what are you waiting for? get creating.
CFG Known as The Guidance Scale
This parameter is basically how much you want stable diffusion to stick with the prompt you have provided. Basically a “creative” scale. The lower the number the more freedom the AI tool will create for you. The higher the number the stricter it sticks to the prompt.
When creating images we normally use between 7 and 12 depending on what we are creating. If we want things to be more real we will push toward 12, if we want some crazy images to appear we might try 7. It really depends on the image we are trying to generate.
We don’t recommend going lower than 7 as it normally gives a strange image that is nothing like the image you had in mind. If you go higher than 12 sometimes it can be a little bit too forceful with your prompt, making strange images show up.
We are going to create 5 images for you using different guidance scales. For this example we are going to use the following settings
- Model: Dream Shaper
- Sampler: Euler A
- Steps: 25
- Seed: 222222222
- Dimensions: 512×768
Prompt:
The personification of the Halloween holiday in the form of a cute girl with short hair and a villain's smile, (((cute girl)))cute hats, cute cheeks, unreal engine, highly detailed, artgerm digital illustration, woo tooth, studio ghibli, deviantart, sharp focus, artstation, by Alexei Vinogradov bakery, sweets, emerald eyesNegative prompt
bad anatomy, extra legs, extra arms, poorly drawn face, poorly drawn hands, poorly drawn feet, fat, disfigured, out of frame, long neck, poo art, bad hands, bad art, deformed, gun, double head, flowers,asian,hyperrealistic,childThe only thing we are going to change is the CFG Scale. We have chosen scales of 1, 5, 7, 12, 20 and 30 for comparison. Below is an image of our results.
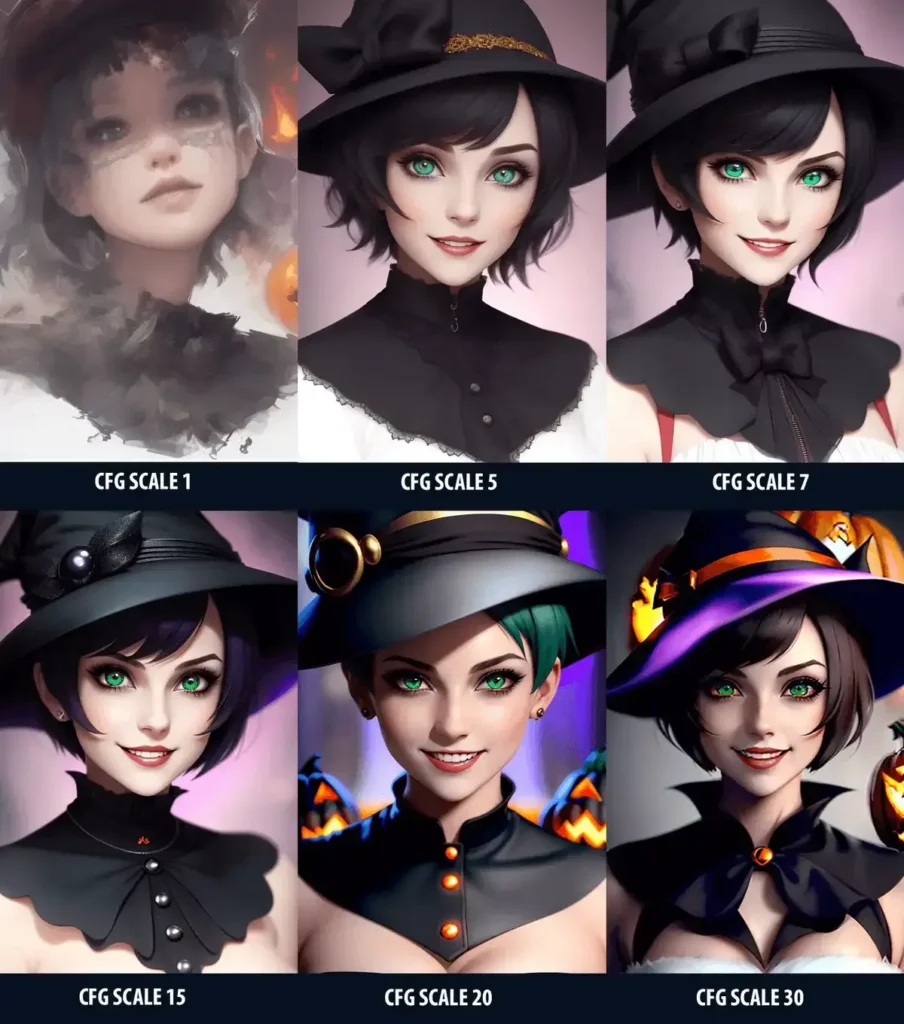
As you can see in the above image there is some obvious changes to the imgae the higher up the scale you go. Sure some of them might not be too obvious where as others are blatantley obvious. Guidance 1 is far different from guidance 30.
So you might be thinking when should I use the different CFG Scale values? Well let us break it down for you. This below list is a brief estimate of when you should use the CFG scale but as always it’s best to test your image generations first on a wide range of scales to see if you like the output:
- CFG 1 – 6: Want to be creative? this is the scale for you. But be warned it can look rather strange at times.
- CFG 7 – 12: Recommended for most prompts. This is what is known as the sweet spot. Rarely will you ever want to venture out of this number.
- CFG 10 – 15: If you feel your prompt is pretty much perfect, then a higher CFG guidance scale will force stable diffusion to follow the prompt more closely. This is recommended for users that don’t want their image to be too creative.
- CFG 16 – 20: Not really recommended but in some rare cases it can turn out quite well.
- CFG >20: Rare for people to venture this high in the guidance scale. But if your prompt is highly detailed it may show some great images. Just remember the higher the scale the more it relies on your prompt.
Don’t Underestimate the Seed Parameter
The seed is a number that decides the initial stages of the image creation. If you keep entering a random seed you will get a different images every time you enter the same prompt. This why knowing the seed is important if you want to share your images or reproduce similar images with the same prompt.
The seed consists of 9 numbers there is no definitive rule on what the difference is between seed 111111111 and seed 999999999. We just know they give you different results. Some people are reluctant to share their seed because they believe it’s what gives their images their own unique look. It’s not uncommon for people to save SEED numbers and use them on a large portion of their generations.
When ever you create an image with stable diffusion it will take your prompt, your settings and alot a random SEED to your image generation. You can se the seed number if you want to. In the below picture example we kept the same seed throughout but changed the colour of our characters hair. The seed we stuck with was “999999999”.
Here is the example picture of the test we did on the seed parameter for stable diffusion:
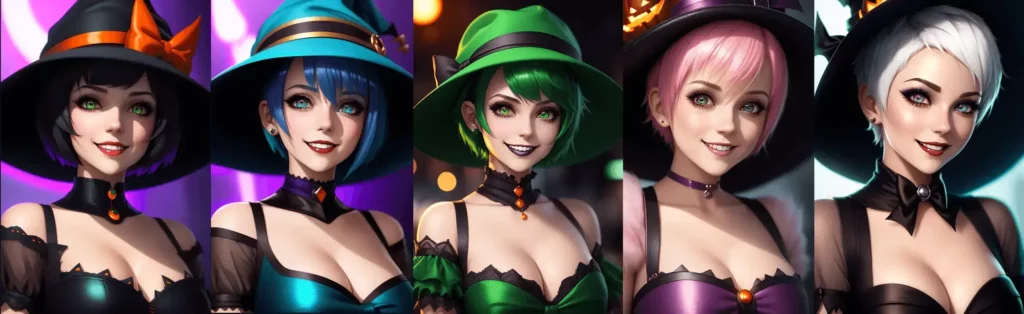
As you can see in the above images the character is quite similar. White Hair seems to have changed things a little though. When things like this happen you need to play around with your prompt a little more to ensure this doesn’t happen in the future.
Keeping the same seed is what you need to do in order to engineer your prompt. You are wantng to know exactly how certain keywords are effecting an image. Last thing you want is a random image every time you generate something. So it’s best to stick with the same seed when testing your prompt.
Another pro tip is that when you are generating images we stable diffusion you should alway generate 4 – 6 images in a batch so you can pick the best of a bunch. Sure it might take you more time but it does help you with deciding weather or not to ditch certain keywords in your prompt.
Size Matters – Use Dimensions
When it comes to creating images with stable diffusion you also can give it dimensions that you wish your image to be creating in.
The default size is 512 x 512 we prefer to use 512 x 768 for portrait images and for quick generation. You can scale up to larger sized images, but please note this requires more VRAM. If your image stops generating due to “lack of memory” you should reduce these dimensions.
Please note you will get different results depending on which dimensions you are using i.e portrait and landscape images.
Batch Size Parameter
This refers to how many images will be created in 1 generation. This will generate one Image after another in a batch. We tend to stick to 6 with this one, sure it’s a buit overkill but it allows us to select the best image for the job and find out if our prompt has any potential.
Batch Count Parameter
This Stable Diffusion Parameter means how many images stable diffusion is going to create in a single batch. Each time stable diffusion generates and image it will look at the batch count.
Here is an example of how batch count works:
Batch count set to 3 – When you hit generate you will generate 3 images per batch size. So if your batch size is also 3 your generation process will create 9 images by the end.
Conclusion
So there we have out our guide on how to use Parameters with stable diffusion. We hope now you have a little more understanding on how to use these features. We do hope this enables you to create stunning AI generative images!
What did you think of our guide, is there anything else you would like to add? we would love for you to leat us know how it has helped you in the comments below.