Everyone is asking it, so we are going to show you how to create realistic people with Stable Diffusion
If you are a fan of Stable Diffusion you might be aware that one of it’s more popular uses is to generate realistic people. If you know how to you can create characters that look quite realistic. In this guide we are going to show you how to create a photo realistic style portrait image. You will learn about prompts, models and ultimately how you can generate realistic people with AI.
We will be using the AUTOMATIC1111 Stable Diffusion GUI to generate realistic people. With the popularity of our stable diffusion cheat sheet, we decided to create a guide on something that everyone wants to know about and that is how to create realistic people. If you are running a windows machine and would like to know how to install this Stable Diffusion GUI then you can check out our online guide.
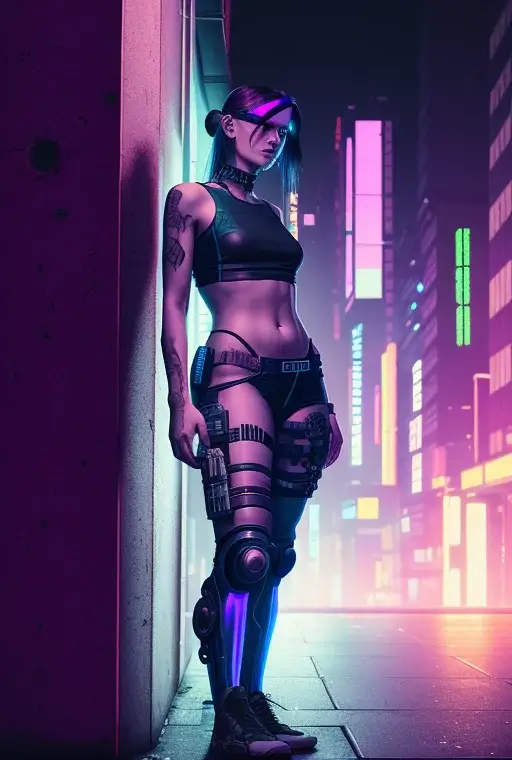
The Prompt: “full body portrait of a cyberpunk woman leaning on a wall in cyberpunk city street at night”
Ok so the prompt might not be realistic but we are trying to turn something of pure fantasy into a believable situation. Also who doesn’t love cyberpunk? Feel free to edit the prompt as you wish.
Here is our default setup for stable diffusion we might edit these parameters later down the line. For now the standard is
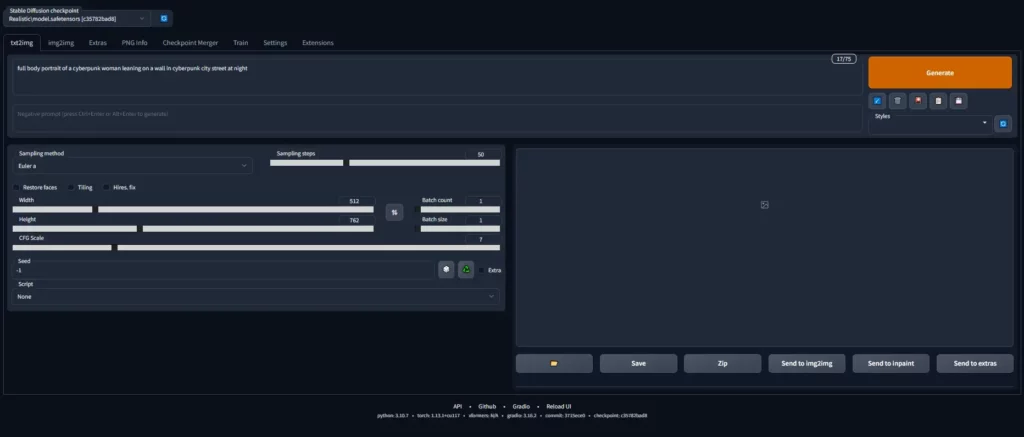
- Dimensions: 512 x 762
- CFG Scale: 7
- Sampling Method: Euler A
- Seed -1
- Sampling Steps: 50 (we set it this high for quality)
- Model: Realistic Model you can find many models at civitai
- Batch Count: 1
- Batch Size: 1
Ensure you enter these variables when generating your prompts. You can change this at a later date if you wish and play around with the numbers a little to get different results. Depending on how quick you want your images to generate or how many depends on the Graphics card your system has. If you have a good one with plenty of VRAM you can increase the batch size and count. Play around with it see what suites you the best, if you get out of memory reduce these settings.
Now brace yourself for our first image, it’s going to be a rough one. We are aiming to create realistic people with stable diffusion, let’s see how that turns out.
We warned you, right? This does not look realistic nor human for that matter. This is because we did not give stable diffusion a good enough prompt to work with. Another key factor is that we didn’t use the negative prompt, this is literally the holy grail of prompt engineering. Please note this guide is aiming towards creating realistic characters with stable diffusion, the best way to create even more realistic characters is to use appropriate models. So remember this going forward.
The Negative Prompt
Ah yes, the negative prompt. This is a great feature that stable diffusion offers and it allows users to emit things from their images. A standard negative prompt would be “disfigured, ugly, bad, immature, cartoon, anime, 3d, painting, b&w” this helps eliminate some of those features from our generated image. Please note stable diffusion has no biases and will generate what you ask it to. Some may find this offensive, but be aware it’s a tool that you can use not a real person.
Let’s try out this prompt on our previous image and see if there are any changes to our image.
As you can see the image has some slight improvements to the previous one. But we still have some clear problems, the main problem is of course in the face.
Let’s Change the Sampling Method
Our current sampler would result in our final model looking more like a game character. We don’t want that we want something more realistic. So let’s change that to “DPM++ 2M Karras”. Might this one looks just as scary? Let’s roll the dice and see what we get.
This is why it pays to play around with the settings. Generate a few images by changing the sampling methods and see what you can create. Once you get something you like the look of try to stick with it through the tutorial. We are sticking with DPM++ 2M Karras for now.
Let’s Play Around with Lighting and Position of the Model
To ensure a Realistic character there are few camera tricks we can do. The main trick is to play around with lighting. We are going to be using some common lighting keywords “rim lighting, studio lighting“.
Rim Lighting is basically backlighting it gives the character some light behind them. Then we have studio lighting which makes it appear this was taken at a photo shoot. These methods are commonly uses within a photographers studio, so fit nicely in our prompt.
Now we are going to give our model a command “looking at camera” this is to tell stable diffusion that we want our model to be looking at the camera, kind of how a realistic person would do when posing for a photoshoot. Remember we want to create realistic characters for stable diffusion and in order to do this we need to make them look human, warts and all.
So here is our new prompt remember to keep the negative prompt the same. Please be aware your image may look different and there might be some abnormalities, we are still only creating a basic prompt here.
“full body portrait of a cyberpunk woman leaning on a wall in cyberpunk city street at night, rim lighting, studio lighting, looking at camera”
As you can see the overall feel of the image is looking better, only issue we can see that’s obvious is the face. This is basically the further back someone is in an image the more distorted their face becomes.
Let’s Change the Camera Quality
Let’s face it the best way to create realistic people with stable diffusion is to take the role of a true photographer and what is more important than lighting to a photographer? What they are being paid right? no the camera of course! so let’s feed stable diffusion some keywords and see if it changes our image.
Here are some sample keywords you can use, you don’t need to use them all. Play around with them see what results you get.
“dslr, ultra quality, sharp focus, tack sharp, dof, film grain, Fujifilm XT3, crystal clear, 8K UHD“
We are going to now regenerate our image with the following prompt, let’s go all out! We are also going to input ((close up)) into our prompt to bring the model forward. () Strengthen your keyword.
“full body portrait of a cyberpunk woman leaning on a wall in cyberpunk city street at night, ((close up)), rim lighting, studio lighting, looking at camera, dslr, ultra quality, sharp focus, tack sharp, dof, film grain, Fujifilm XT3, crystal clear, 8K UHD”
Please note it’s best to generate 3 + photos we normally create 6 as stable diffusion is random. Sometimes you will get an amazing image others not so amazing. This allows you to choose the best of a batch or even find out if your prompt is heading in the right direction.
As you can see pulling our character forward has reduced some of the facial abnormalities. If you have seen AI art before you might be familiar with people being close up to the camera, there is a valid reason for this.
Let’s Add Some Human Details to the Face
This is now your time to shine, think of details that are familiar with the human face. For this example we want to add pores, sweat, details and even bring out the eyes. We have been writing prompts for a while so we have created a basic prompt below, but feel free to create your own.
“detailed symmetrical face, high detailed skin, skin pores, reflective eyes, makeup, (red lipstick), (shiny lips), (white sclera), (sweat)”
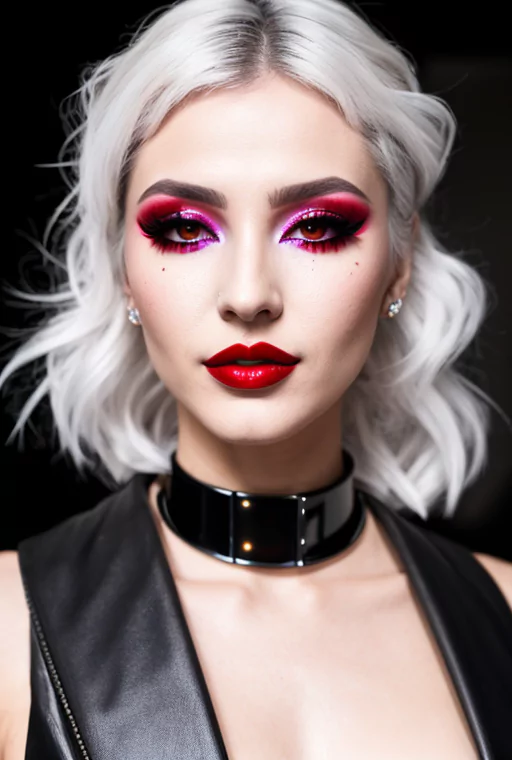
Now that we have our “Human Face” details let’s look at our full prompt, remember the negative prompt and settings have still not changed… yet.
“full body portrait of a cyberpunk woman leaning on a wall in cyberpunk city street at night, ((close up)), rim lighting, studio lighting, looking at camera, dslr, ultra quality, sharp focus, tack sharp, dof, film grain, Fujifilm XT3, crystal clear, 8K UHD, detailed symmetrical face, high detailed skin, skin pores, reflective eyes, makeup, (red lipstick), (shiny lips), (white sclera), (sweat)”
Please be aware we are still only using “20” steps so this will give us a basic image we can improve the image quality by increasing this number, we will brush on this subject later down the line.
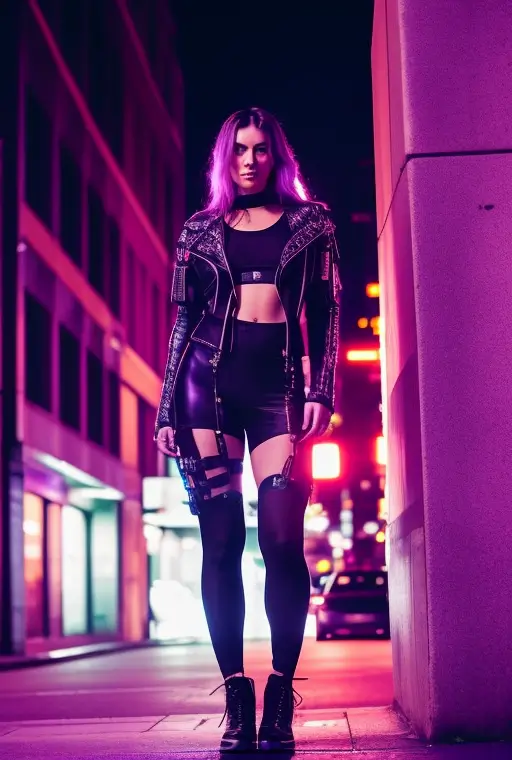
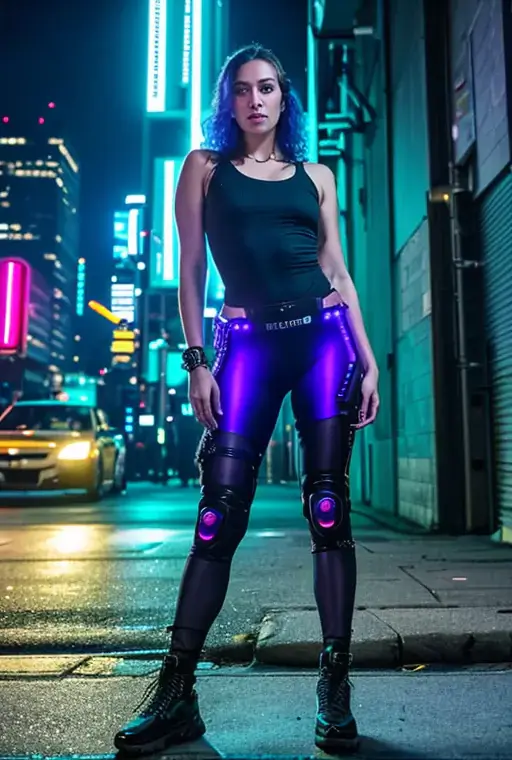
Here are 6 images created with our prompt notice how different they are? This is the randomness of stable diffusion and in order to reduce this we need to add a lot more keywords and focus more on our negative prompt.
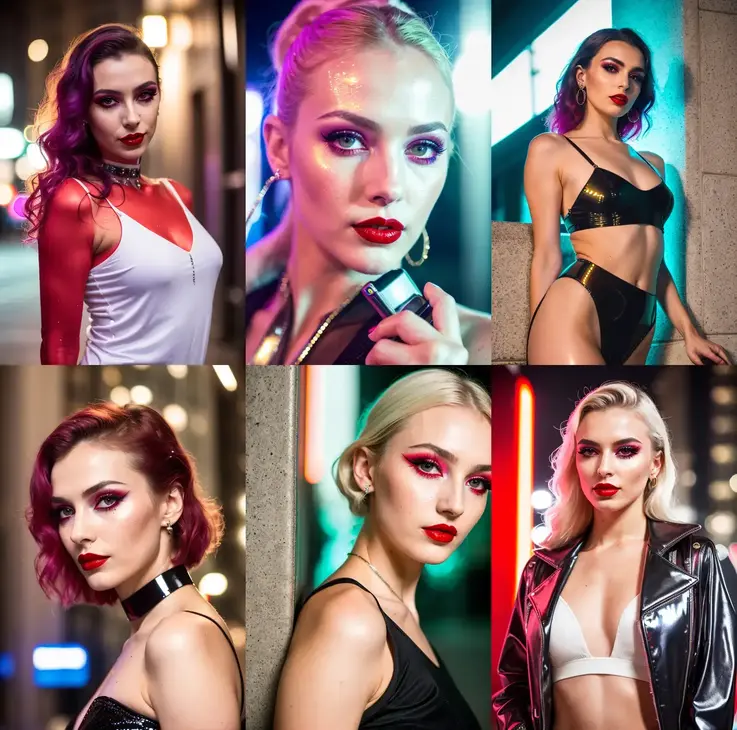
Because there are factors we have not asked stable diffusion for it is starting to throw up random colours of hair and random outfits. We can define these too!
Let’s Spice up the Negative prompt a little
We are going to share with you our fully customized negative prompt this in depth and has been designed to remove certain issues with our images.
“(shorts), face tattoo, ((day time)), ((blue eyes)), lake, ocean, river, (shorts:1.2), (black sports bra), ((black hair)), ((brown hair)), canvas frame, cartoon, 3d, ((disfigured)), ((bad art)), ((deformed)), ((extra limbs)), ((close up)), ((b&w)), weird colors, blurry, (((duplicate))), ((morbid)), ((mutilated)), [out of frame], extra fingers, mutated hands, ((poorly drawn hands)), ((poorly drawn face)), (((mutation))), (((deformed))), ((ugly)), blurry, ((bad anatomy)), (((bad proportions))), ((extra limbs)), cloned face, (((disfigured))), out of frame, ugly, extra limbs, (bad anatomy), gross proportions, (malformed limbs), ((missing arms)), ((missing legs)), (((extra arms))), (((extra legs))), mutated hands, (fused fingers), (too many fingers), (((long neck))), Photoshop, ugly, tiling, poorly drawn hands, poorly drawn feet, poorly drawn face, out of frame, mutation, mutated, extra limbs, extra legs, extra arms, disfigured, deformed, cross-eye, body out of frame, blurry, bad art, bad anatomy, 3d render”
Pretty large right? So let’s try to see what happens with our image.
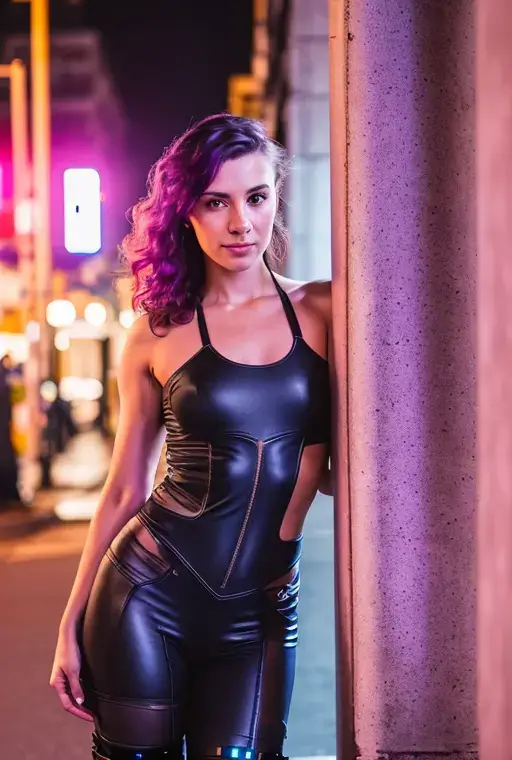
Even with just 20 steps can you see how much our image has improved? This is why we can’t express to you how important it is to have a in depth high quality negative prompt. Does this look realistic enough for you?
Feel free to play around with the prompt. Let us know in the comments below what you use to create your variations of characters with stable diffusion.
Stable Diffusion Prompt Engineering Example
Since you have reached the end of our article we are going to give you a sneak peak into one of our complete prompts.
Here is the settings for our image
- Sampling Method: DPM++2M Karras
- Width: 512
- Height: 768
- CFG: 7
- Sampling Steps: 120
- Model: Realisitc
Main Prompt:
full body portrait of a cyberpunk woman leaning on a wall in cyberpunk city street at night, rim lighting, studio lighting, looking at camera, (action scene), (wide angle), ((Night time)), city lights, ((neon cyberpunk city street:1. 3)), (neon lights), stars, moon, (film grain:1. 4), colored lighting, full body, cyberpunk woman in a futuristic city in a cyberpunk city, (hands in pockets), (leaning on wall), dynamic pose, ((rgb gamer headphones)), ((tanned skin:1. 3)), ((angry)), (angry eyebrows), scowl, (e-girl blush:1. 2) long hair, (freckles:0. 9), detailed symmetrical face, (dark crimson hair:1. 2), short hair, (messy hair bun), (undercut hair:1. 4), punk girl, ((tattoos)), alt girl, ((face piercings:1. 2)), ((fingerless gloves)), (brown eyes), many rings, reflective eyes, makeup, (red lipstick), (shiny lips), (white sclera), (sweat), ear piercings, detailed lighting, rim lighting, dramatic lighting, chiaroscuro, (white band shirt), ((ripped denim bomber jacket:1. 1)), (jean jacket), long sleeves, bracelets, (torn blue jean pants:1. 2)), (mom jeans), brick wall, (polluted sky), wall graffiti, ((doc martens)), ((combat boots)), (black shoelaces, muddy boots, (from below:1. 2), (wide angle lens), professional majestic impressionism oil painting by Waterhouse, John Constable, Ed Blinkey, Atey Ghailan, Studio Ghibli, by Jeremy Mann, Greg Manchess, Antonio Moro, Intricate, High Detail, dramatic, makoto shinkai kyoto
Negative Prompt
(shorts), face tattoo, ((day time)), ((blue eyes)), lake, ocean, river, (shorts:1.2), (black sports bra), ((black hair)), ((brown hair)), canvas frame, cartoon, 3d, ((disfigured)), ((bad art)), ((deformed)), ((extra limbs)), ((close up)), ((b&w)), weird colors, blurry, (((duplicate))), ((morbid)), ((mutilated)), [out of frame], extra fingers, mutated hands, ((poorly drawn hands)), ((poorly drawn face)), (((mutation))), (((deformed))), ((ugly)), blurry, ((bad anatomy)), (((bad proportions))), ((extra limbs)), cloned face, (((disfigured))), out of frame, ugly, extra limbs, (bad anatomy), gross proportions, (malformed limbs), ((missing arms)), ((missing legs)), (((extra arms))), (((extra legs))), mutated hands, (fused fingers), (too many fingers), (((long neck))), Photoshop, ugly, tiling, poorly drawn hands, poorly drawn feet, poorly drawn face, out of frame, mutation, mutated, extra limbs, extra legs, extra arms, disfigured, deformed, cross-eye, body out of frame, blurry, bad art, bad anatomy, 3d render
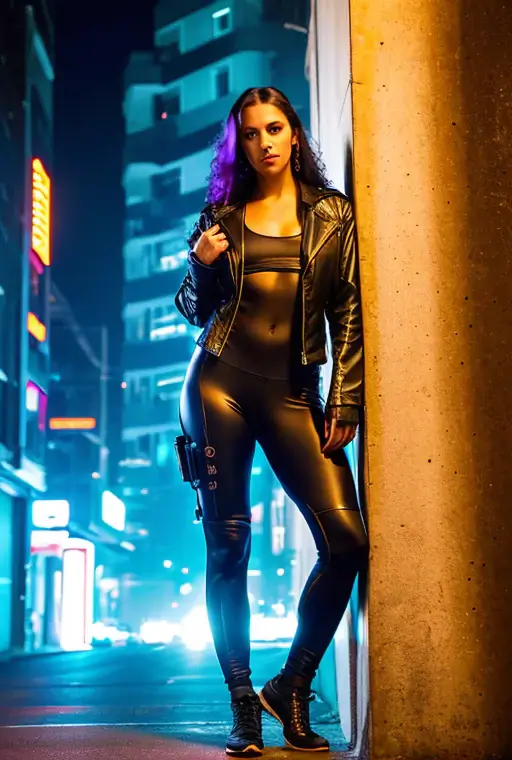
Here is our end result
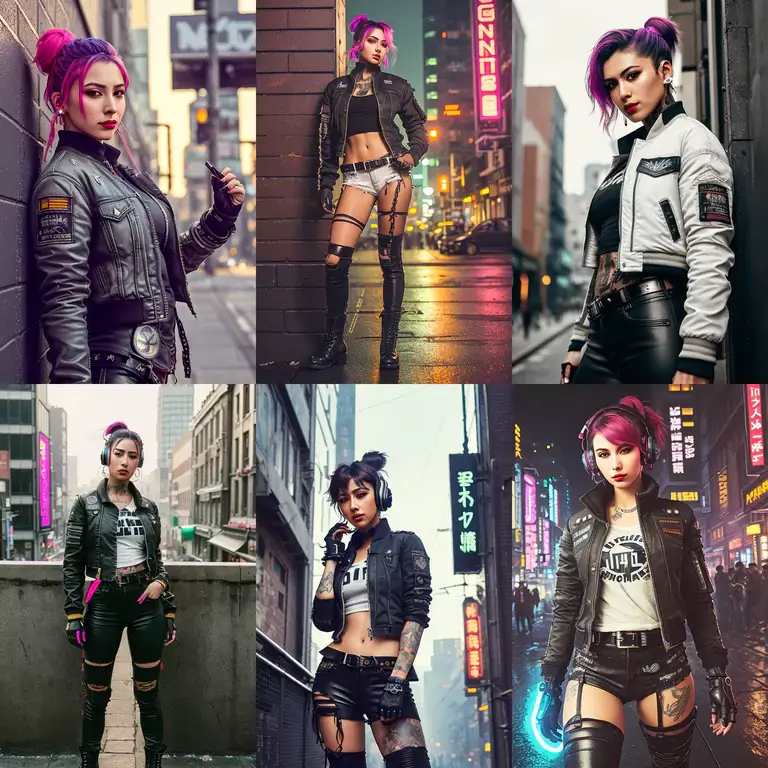
Conclusion
Creating realistic models with stable diffusion requires you to be a bit more in depth with your prompts. This is where a prompt engineer comes in handy. If this is not your forte it’s ok you can find prompt websites online like prompt hero.
Some key points to take home are:
- The Negative Prompt is just as important as your normal prompt.
- Using the correct model is really important
- Using A Higher Step Count can improve the quality of the image
- Ensure your model is closer to the camera
- adding correct keywords to your prompt is key
- Play around with your prompts till you get something you like
- Try to create images in batches
- If you want to be persistent stick with the same seed
- Play around with Samplers till you get the image you like.
That’s all there is to it! We do hope you have enjoyed this guide on How to generate realistic people With Stable Diffusion, happy generating! Just remember you can even sell AI art, so why not try to create some stunning images and perhaps someone might be interested in your work.
Tags: [Breaking]